Want to quit using Adobe Lightroom completely?
I am not advising that you stop using Adobe Lightroom. But, if you want to, here is a workflow that worked for me.
Context
I have been using Adobe Lightroom Classic for over ten years and never considered using another software to edit images until recently. I have lost trust in Adobe to do the right thing after they allegedly attempted to train its AI with their customers’ photographs. I know the decision was walked back, but the whole ordeal was a breach of trust. That, combined with the prohibitively expensive cost of purchasing their products (I had the All Apps subscription), and the additional fee they charge their users for ending the subscription, pushed me to explore for alternatives.
Secondly and most importantly, I was unaware of any alternatives until recently.
Rejected Alaternatives
Capture One – Bad user experience but powerful software. The tethering options are great, but I don’t take tethered photographs that often
Dark Table – Free and opensource. But, again, terrible user experience
Viable Alternatives
Luminar Neo – Great user experience, plenty of editing tools and you won’t miss much coming from lightroom. The tools are neatly organized and also provides creative editing from within the app.
Photomator – Equally good user experience as Luminar Neo. A bit basic when it comes to editing tools, but the ML Editing is a great way to speed up the process.
For my editing needs, Luminar Neo performed better with nature and wildlife photographs. Photomator, on the other hand, was excellent for making quick edits to street photographs and portraits. So, I will be keeping both Luminar Neo and Photomator. I can buy both of them for the price of paying for Adobe Lightroom and Photoshop subscription for a year.
The catalog features of these applications aren’t particularly good. However, I have a better solution for cataloging using Apple Photos and it performs better than Lightroom Classic.
Managing catalogs with Apple Photos
Yes, Apple Photos can manage all your catalog even better than Light Room as long as you don’t catagorize projects based on camera and lenses. The key is to disconnect your photos library from iCloud so that it doesn’t attempt to sync all your raw photos to cloud.
You can even manage your library from an external hard drive. Here are the steps:
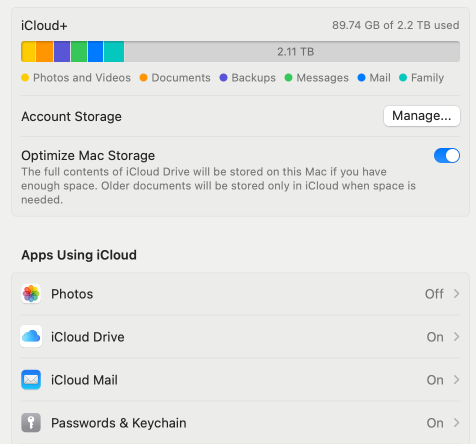
Step 1 (Optional) – Disable iCloud for Photos
Disable the iCloud for photos on your settings app. This is optional if your photo library is not that huge and you don’t share your iCloud account with other devices.

Step 2 (Optional) – Move your Photos Library to external drive
⌘ + Select and drag your Photos Library from Pictures folder to your desired external drive location
Step 3 – Select the new library
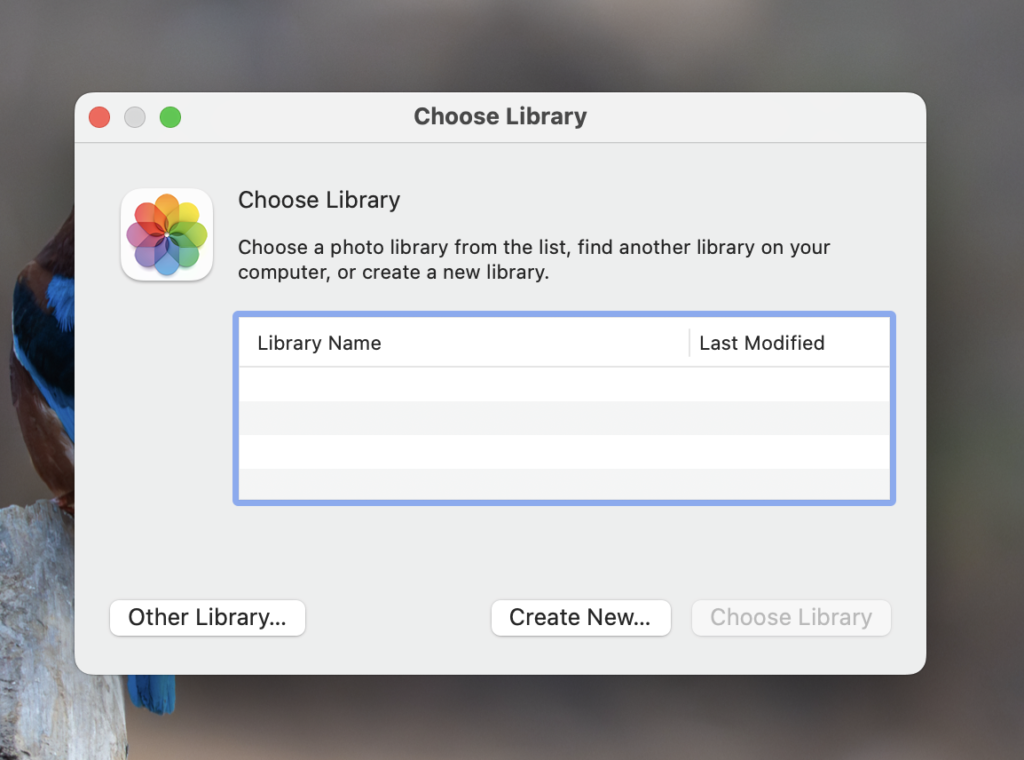
Press and hold Option (or Alt) ⌥ key and open the Photos app. This will prompt you to choose a new library. Select the library from your new location by clicking on “Other Library” button.

Step 4 – Verify
Once you have done these steps, verify that Photos app is now using the new library on the exernal drive. You can do that by going to the settings menu on Photos
Step 5 – Add your photos
Now you can start adding photos and raw files to your library directly from your cards.
Managing your catalog with Apple Photos
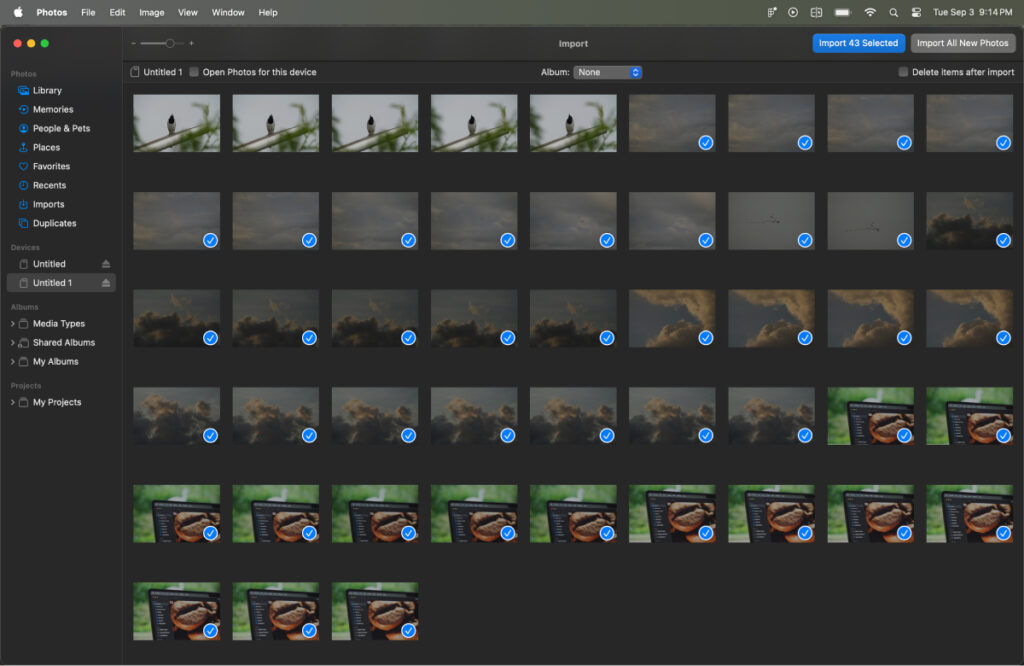
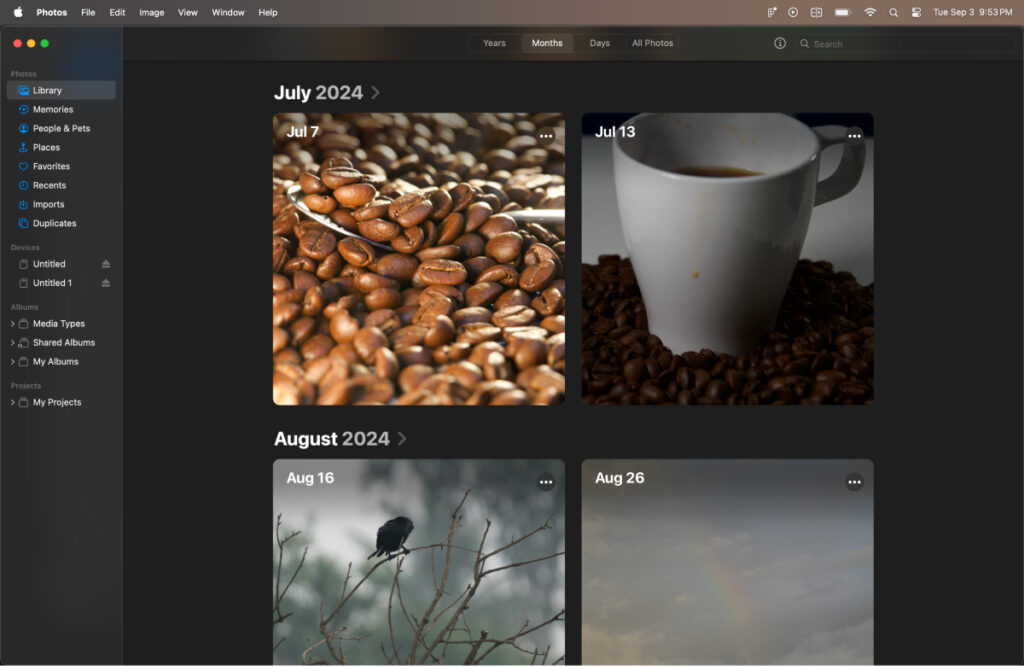
I think there is not a better alternative to managing image catalog than Apple Photos. Dispite its simplicity, the app is really quite powerful. The layout is simple and effective. The smart previews of images organized by years, months and dates, helps you easily find photos in an intuitive way.
Editing Photos with Luminar Neo & Photomator
I won’t go in to the details of editing photos on these app as it is easy to do and there are plenty of online resources available to learn more about their capabilities. This guide just shows you how I do it from Apple Photos

Edit the photos directly from Apple Photos
Right-Click / ⌃ + Click / Control + Click, go to Edit With menu and select an app you want to edit the photo with. That’s it.
The clean, beautifully designed interface of Luminar Neo
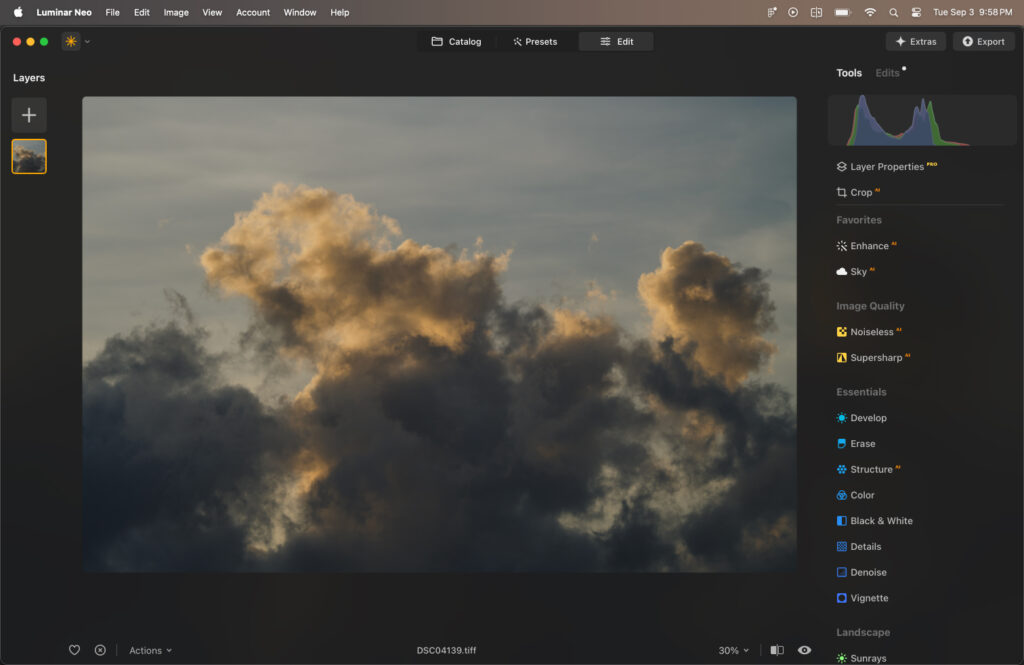

Your basic editing tools are available under Develop panel
Once the editing is done and you want to come back to it later, you can send them directly to Photos App by bringing up the context menu (Right Click / ⌃ Click / Control+Click)


A copy of your photo with all the edits will be created in Photos app for you to come back and edit later.
Want to edit this photo again in Photomator, you can do that too from Photos app.

Closing Thoughts
That’s it. With this workflow, my catalog management is a lot better than that of using Lightroom. I also love that I don’t have to put up with the horrible UX Adobe Lightroom
One caveat tough, if you are someone who relies on automatic lens correction tools on Lightroom, stick with Lightroom. Neither Photomator, nor Luminar Neo support automatic lens profiles and corrections at this time.
